
T.김동식
자바의 자료구조, collection
list, set, map
isELIgnored=false
Expression Language, 표현언어 EL
== eq equal
!= ne not equal
< lt little
> gt greater
<= le little or equal
>= ge greater or equal
기존 Expression Tag(<%= %>) 대체
${표현식}
로그인/회원가입 구현
<%
request.setCharacterEncoding("utf-8");

//result에서 login페이지로 다시 forward할때 message를 받는 용도, 첫코딩시 신경쓰지않는다, 이후 추가해도 무방.
String msg = request.getParameter("message");
%>
//login 폼
<form name="form" action="result.jsp" method="post">
아이디 <input type="text" name="user_id"><br>
비밀번호 <inputtype="password" name="user_pw"><br>
<input type="submit" value="로그인"> <input type="reset" value="초기화">
<%if(msg!=null){%>
//result에서 forward시 msg를 출력할 영역, 첫코딩시 신경쓰지않는다, 이후 추가해도 무방.
<p class="warnning"><%=msg %></p><%}%>
</form>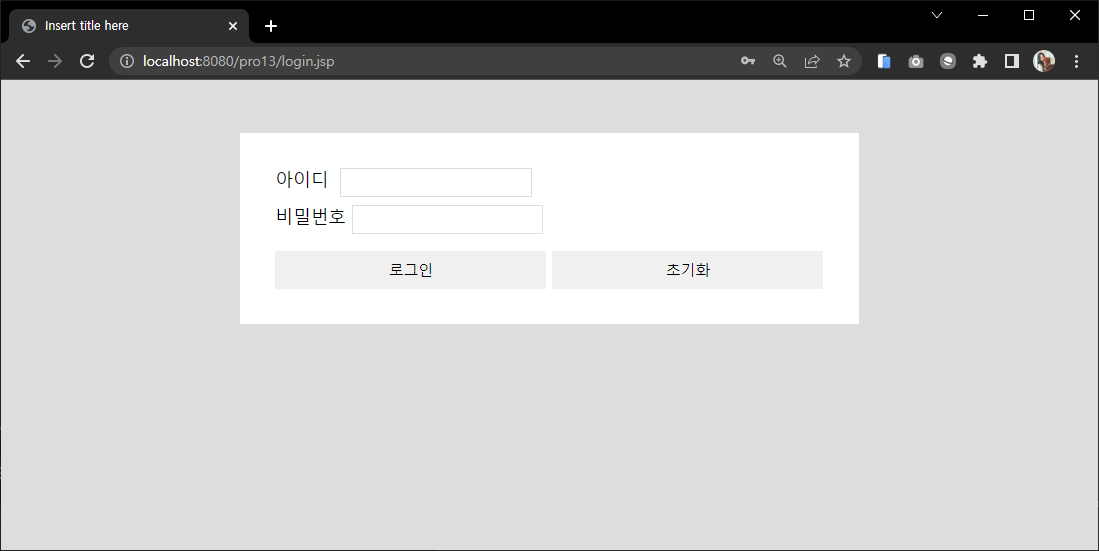
<%
request.setCharacterEncoding("utf-8");
String user_id =request.getParameter("user_id"); //id값을 가져옴
String msg = "아이디가 올바르지 않습니다, 다시입력해주세요"; //forward시 보낼문구 지정

if(user_id==null||user_id.length()==0){%>//아이디를 입력하지 않았을 경우
	<jsp:forward page="login.jsp"> //login.jsp로 forward한다.
	<jsp:param value="<%=msg %>" name="message"/>//msg를 함께 전송
	</jsp:forward>
<% }%>

//아이디를 입력했을 경우 forward없이 출력.
<%= user_id%>

//method가 get일경우, 정보가 노출된다.
//예: http://localhost:8080/pro13/MemberForm.html?id=&pwd=&name=&email=
<form method="post" action="member.jsp">
<h1 class="mb-1 text-center" style="">회원 가입창</h1>
<table align="center">
<tr>
<td width="200"><p align="right">아이디</td>
<td width="400"><input type="text" name="id"></td>
</tr>
<tr>
<td width="200"><p align="right">비밀번호</td>
<td width="400"><input type="password" name="pwd"></td>
</tr>
<tr>
<td width="200"><p align="right">이름</td>
<td width="400"><p><input type="text" name="name"></td>
</tr>
<tr>
<td width="200"><p align="right">이메일</td>
<td width="400"><p><input type="text" name="email"></td>
</tr>
<tr>
<td width="200"><p> </p></td>
<td width="400">
<input type="submit" value="가입하기">
<input type="reset" value="다시입력">
</td>
</tr>
</table>
//객체를 만들 class 코딩

package sec01.ex01;
import java.sql.Date;
public class MemberBean {
	private String id;
	private String pwd;
	private String name;
	private String email;
	private Date joinDate;
	public MemberBean(String id, String pwd, String name, String email) {
		this.id = id;
		this.pwd = pwd;
		this.name = name;
		this.email = email;
	}
	public String getId() {return id;}
	public void setId(String id) {this.id = id;}
	public String getPwd() {return pwd;}
	public void setPwd(String pwd) {this.pwd = pwd;}
	public String getName() {return name;}
	public void setName(String name) {this.name = name;}
	public String getEmail() {return email;}
	public void setEmail(String email) {this.email = email;}
	public Date getJoinDate() {return joinDate;}
	public void setJoinDate(Date joinDate) {this.joinDate = joinDate;}
}
//객체를 저장/추가할 class 코딩
package sec01.ex01;
import java.sql.Connection;
import java.sql.Date;
import java.sql.PreparedStatement;
import java.sql.ResultSet;
import java.sql.Statement;
import java.util.ArrayList;
import java.util.List;
import javax.naming.Context;
import javax.naming.InitialContext;
import javax.sql.DataSource;
public class MemberDAO {
private Connection con;
private PreparedStatement pstmt;
private DataSource dataFactory;
public MemberDAO() {
try {
Context ctx = new InitialContext();
Context envContext = (Context) ctx.lookup("java:/comp/env");
dataFactory = (DataSource) envContext.lookup("jdbc/oracle");
} catch (Exception e) {
e.printStackTrace();
}
}
public List listMembers() {
List list = new ArrayList();
try {
con = dataFactory.getConnection();
String query = "select * from t_member order by joinDate desc ";
System.out.println("prepareStatememt: " + query);
pstmt = con.prepareStatement(query);
ResultSet rs = pstmt.executeQuery();
while (rs.next()) {
String id = rs.getString("id");
String pwd = rs.getString("pwd");
String name = rs.getString("name");
String email = rs.getString("email");
Date joinDate = rs.getDate("joinDate");
MemberBean vo = new MemberBean();
vo.setId(id);
vo.setPwd(pwd);
vo.setName(name);
vo.setEmail(email);
vo.setJoinDate(joinDate);
list.add(vo);
}
rs.close();
pstmt.close();
con.close();
} catch (Exception e) {
e.printStackTrace();
}
return list;
}
public void addMember(MemberBean memberBean) {
try {
Connection con = dataFactory.getConnection();
String id = memberBean.getId();
String pwd = memberBean.getPwd();
String name = memberBean.getName();
String email = memberBean.getEmail();
String query = "insert into t_member";
query += " (id,pwd,name,email)";
query += " values(?,?,?,?)";
System.out.println("prepareStatememt: " + query);
pstmt = con.prepareStatement(query);
pstmt.setString(1, id);
pstmt.setString(2, pwd);
pstmt.setString(3, name);
pstmt.setString(4, email);
pstmt.executeUpdate();
pstmt.close();
} catch (Exception e) {
e.printStackTrace();
}
}
}//sec01.ex01 안에있는 위 class들을 모두 import + setCharacterEncoding
<%@ page language="java" contentType="text/html; charset=UTF-8"
pageEncoding="UTF-8" import="java.util.*,sec01.ex01.*" %>
<%request.setCharacterEncoding("utf-8");%><%request.setCharacterEncoding("utf-8");
String id = request.getParameter("id");
String pwd = request.getParameter("pwd");
String name = request.getParameter("name");
String email = request.getParameter("email");
MemberBean m = new MemberBean(id, pwd, name, email);%>
//불러온 값을 member class list에 add
<%
MemberDAO memberDAO = new MemberDAO();
memberDAO.addMember(m);
List membersList = memberDAO.listMembers(); %><body class="body-lg">
<table align="center" width="100%">
<tr align="center" bgcolor="#99ccff">
<td width="7%">아이디</td>
<td width="7%">비밀번호</td>
<td width="5%">이름</td>
<td width="11%">이메일</td>
<td width="5%">가입일</td>
</tr>
<%if(membersList.size()==0){%> //만약 회원이 없을 경우를 대비하여 안내문구 지정
<tr><td colspan="5"><p align="center"><b><span style="font-size:9pt;">등록된 회원이 없습니다.</span></b></p></td></tr>
//회원이 있을 경우
<%}else{ //membersList만큼 for문으로 돌려 가져와
for( int i = 0; i < membersList.size(); i++ ) {
MemberBean bean = (MemberBean) membersList.get(i);%>
//뿌려줄것
<tr align="center">
<td><%=bean.getId() %></td>
<td><%=bean.getPwd() %></td>
<td><%=bean.getName() %></td>
<td><%=bean.getEmail() %></td>
<td><%=bean.getJoinDate() %></td>
</tr>
<% } // end for for문이 완료될때까지 tr은 추가된다.
} // end if
%>
<tr height="1" bgcolor="#99ccff"><td colspan="5"></td></tr>
</table>
</body>
+ jsp:useBean을 이용해 코드를 단축해보자
위 코드중 일부분의 변화 가능성을 이해한다.
<%request.setCharacterEncoding("utf-8");
String id = request.getParameter("id");
String pwd = request.getParameter("pwd");
String name = request.getParameter("name");
String email = request.getParameter("email");
MemberBean m = new MemberBean(id, pwd, name, email);%>

//불러온 값을 member class list에 add
<%
MemberDAO memberDAO =  new MemberDAO();
memberDAO.addMember(m);
List membersList = memberDAO.listMembers(); %>//새로운 useBean 객체의 *모든 property를 가져온다.
<jsp:useBean id="m" class="sec01.ex01.MemberBean" scope="page"/>
<jsp:setProperty property="*" name="m"/>
<%
MemberDAO memberDAO = new MemberDAO();
memberDAO.addMember(m);
List membersList = memberDAO.listMembers(); %>
+표현방법의 다양성을 이해한다.
<body class="body-lg">
	<table align="center" width="100%">
		<tr align="center" bgcolor="#99ccff">
			<td width="7%">아이디</td>
			<td width="7%">비밀번호</td>
			<td width="5%">이름</td>
			<td width="11%">이메일</td>
			<td width="5%">가입일</td>
		</tr>
		<%if(membersList.size()==0){%> //만약 회원이 없을 경우를 대비하여 안내문구 지정
	<tr><td colspan="5"><p align="center"><b><span style="font-size:9pt;">등록된 회원이  없습니다.</span></b></p></td></tr>

      //회원이 있을 경우
      <%}else{ //membersList만큼 for문으로 돌려 가져와
	   for( int i = 0; i < membersList.size(); i++ ) {
	      MemberBean bean = (MemberBean) membersList.get(i);%>
          //뿌려줄것
	   <tr align="center">
	       <td><%=bean.getId() %></td>
	       <td><%=bean.getPwd() %></td>
	       <td><%=bean.getName() %></td>
	       <td><%=bean.getEmail() %></td>
	       <td><%=bean.getJoinDate() %></td>
	   </tr>
	<% } // end for for문이 완료될때까지 tr은 추가된다.
	   } // end if
	%>
		<tr height="1" bgcolor="#99ccff"><td colspan="5"></td></tr>
	</table>
</body> <%/* 파라미터로 값을 get하여 뿌려줄것이다 */
request.setCharacterEncoding("UTF-8");
String id=request.getParameter("id");
String pwd=request.getParameter("pwd");
String name= request.getParameter("name");
String email= request.getParameter("email");%>
...
<tr align=center>
<!-- 변수값으로 보여줄수도있고 -->
<td><%=id %> </td>
<td><%=pwd%> </td>
<td><%=name %> </td>
<td><%=email %> </td>
</tr>// ${} 표현식을 쓰기위해서 isELIgnored="false"설정
<%@ page language="java" contentType="text/html; charset=UTF-8"
pageEncoding="UTF-8"
isELIgnored="false" %>
...
<tr align=center>
<!-- isELIgnored="false" 설정후 표현언어로 별도의 세팅없이 param.id바로 가져올 수도 있다 -->
<td>${param.id} </td>
<td>${param.pwd} </td>
<td>${param.name} </td>
<td>${param.email}</td>
</tr><%@ page language="java" contentType="text/html; charset=UTF-8"
pageEncoding="UTF-8"
isELIgnored="false" %>
<%request.setCharacterEncoding("UTF-8");%>
...
<tr align=center>
<td>${param.id } </td>
<td>${param.pwd} </td>
<td>${param.name } </td>
<td>${param.email }</td>
<!-- requestScope request 객체에 접근하기 위한 역할 -->
<td>${requestScope.address}<br>
<!-- requestScope는 생략이 가능하지만, 실행속도가 느려지고, 구분이 헷갈릴 수 있기때문에 기재해 주는 것이 권장
${address}
</td>
</tr>
jsp:useBean && jsp:setProperty
list을 만드는 class 없이도 값을 보여줄 수 있다.
<%@ page language="java" contentType="text/html; charset=UTF-8"
    pageEncoding="UTF-8"
    isELIgnored="false" %>
<%request.setCharacterEncoding("UTF-8");%>

<!-- 객체를 생성하는 액션태그, MemberBean.jsp에서 new 객체생성 -->
<jsp:useBean  id="m" class="sec01.ex01.MemberBean" />

<!-- useBean 액션태그로 생성한 자바빈 객체의 속성값을 설정 -->
<jsp:setProperty  name="m" property="*" />

...

<!-- 자바코드로 가져와도되고 -->
       <td><%=m.getId() %> </td>
       <td><%=m.getPwd() %></td>
       <td><%=m.getName() %></td>
       <td><%=m.getEmail() %></td>

...

<!-- 표현식으로 가져와도되고 -->
       <td>${m.id } </td>
       <td>${m.pwd} </td>
       <td>${m.name }</td>
       <td>${m.email }</td>
HashMap & ArrayList
<%@ page language="java" contentType="text/html; charset=UTF-8"
	import="java.util.*, sec01.ex01.*" pageEncoding="UTF-8"
	isELIgnored="false"%>
    ...

<jsp:useBean id="m1" class="sec01.ex01.MemberBean" />
<jsp:setProperty name="m1" property="*" />

//ArrayList에 추가
<jsp:useBean id="membersList" class="java.util.ArrayList" />
<% MemberBean m2 = new MemberBean("son", "1234", "손흥민", "son@test.com");
   membersList.add(m1);
   membersList.add(m2);%>

//HashMap에 추가
<jsp:useBean id="membersMap" class="java.util.HashMap" />
<% membersMap.put("membersList",  membersList); //HashMap에 ArrayList 추가후

   membersMap.put("id", "park2");
   membersMap.put("pwd", "4321");
   membersMap.put("name","박지성");
   membersMap.put("email","park2@test.com");%><!-- id, pwd, name, email 를 입력해 추가-->
   <!-- 이제 membersMap안에는 membersList와 (id, pwd, name, email)가 있다. -->

	...

   <td>${membersMap.membersList[0].id}</td>
			<td>${membersMap.membersList[0].pwd}</td>
			<td>${membersMap.membersList[0].name}</td>
			<td>${membersMap.membersList[0].email}</td>

	...

	<td>${membersMap.membersList[1].id}</td>
			<td>${membersMap.membersList[1].pwd}</td>
			<td>${membersMap.membersList[1].name}</td>
			<td>${membersMap.membersList[1].email}</td>

	...

    <td>${membersMap.id}</td>
			<td>${membersMap.pwd}</td>
			<td>${membersMap.name}</td>
			<td>${membersMap.email }</td>
jsp:useBean으로 ArrayList를 추가해 for문, 향상for문으로 출력해보자.
<jsp:useBean id="test" class="java.util.ArrayList" />
<%
	test.add("hi one");
	test.add("hi two");
	test.add("hi three");%>
<%for(int i = 0;i<test.size();i++){%><p><%= test.get(i)%></p><%}%><%for(Object o : test){%><p><%= o %></p><%}%>
Android
<LinearLayout xmlns:android="http://schemas.android.com/apk/res/android"
    xmlns:tools="http://schemas.android.com/tools"
    android:layout_width="fill_parent"
    android:layout_height="fill_parent"
    android:orientation="vertical" >

    <ListView
        android:id="@+id/listView1"
        android:layout_width="match_parent"
        android:layout_height="wrap_content" >
    </ListView>

</LinearLayout>
package com.himedia.project4_2.hb_ch11.adapterview;

import android.os.Bundle;
import android.view.View;
import android.widget.AdapterView;
import android.widget.ArrayAdapter;
import android.widget.ListView;
import android.widget.Toast;

import androidx.appcompat.app.AppCompatActivity;

import com.himedia.project4_2.R;

public class listview extends AppCompatActivity  {

    @Override
    public void onCreate(Bundle savedInstanceState) {
        super.onCreate(savedInstanceState);
        setContentView(R.layout.hb_ch11_listview);
        setTitle("리스트");

        final String[] mid = { "리스트1", "리스트2", "리스트3","리스트4","리스트5","리스트6","리스트7","리스트8","리스트9","리스트10"};

        ListView list = (ListView) findViewById(R.id.listView1);

        //ArrayAdapter객체 만들어 레이아웃 안에 리스트 배열 넣기
        ArrayAdapter<String> adapter = new ArrayAdapter<String>(this,
                android.R.layout.simple_list_item_1, mid);
        list.setAdapter(adapter);

        //리스트뷰에 클릭했을때
        list.setOnItemClickListener(new AdapterView.OnItemClickListener() {
            public void onItemClick(AdapterView<?> arg0, View arg1, int arg2,
                                    long arg3) {
                //Toast띄우기
                Toast.makeText(getApplicationContext(), mid[arg2],
                        Toast.LENGTH_SHORT).show();
            }
        });
    }
}
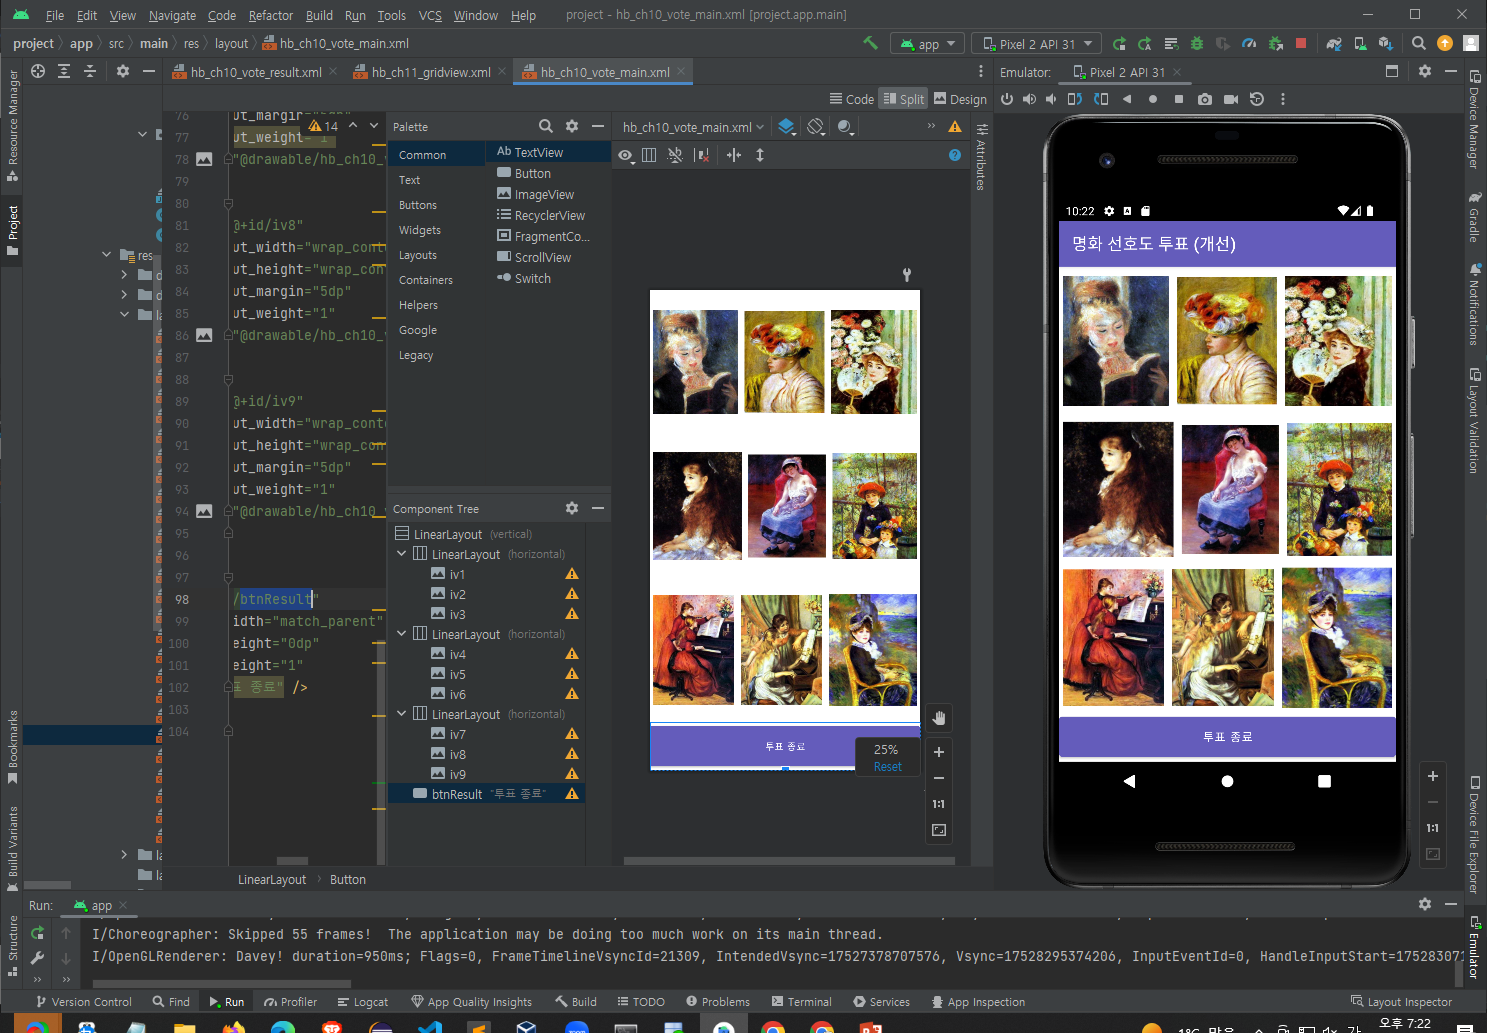
투표앱 구현하기
<LinearLayout xmlns:android="http://schemas.android.com/apk/res/android"
    xmlns:tools="http://schemas.android.com/tools"
    android:layout_width="fill_parent"
    android:layout_height="fill_parent"
    android:orientation="vertical" >

    <LinearLayout
        android:layout_width="match_parent"
        android:layout_height="0dp"
        android:layout_weight="3" >

        <ImageView
            android:id="@+id/iv1"
            android:layout_width="wrap_content"
            android:layout_height="wrap_content"
            android:layout_margin="5dp"
            android:layout_weight="1"
            android:src="@drawable/hb_ch10_vote_pic1" />

        <ImageView
            android:id="@+id/iv2"
            android:layout_width="wrap_content"
            android:layout_height="wrap_content"
            android:layout_margin="5dp"
            android:layout_weight="1"
            android:src="@drawable/hb_ch10_vote_pic2" />

        <ImageView
            android:id="@+id/iv3"
            android:layout_width="wrap_content"
            android:layout_height="wrap_content"
            android:layout_margin="5dp"
            android:layout_weight="1"
            android:src="@drawable/hb_ch10_vote_pic3" />
    </LinearLayout>

    <LinearLayout
        android:layout_width="match_parent"
        android:layout_height="0dp"
        android:layout_weight="3" >

        <ImageView
            android:id="@+id/iv4"
            android:layout_width="wrap_content"
            android:layout_height="wrap_content"
            android:layout_margin="5dp"
            android:layout_weight="1"
            android:src="@drawable/hb_ch10_vote_pic4" />

        <ImageView
            android:id="@+id/iv5"
            android:layout_width="wrap_content"
            android:layout_height="wrap_content"
            android:layout_margin="5dp"
            android:layout_weight="1"
            android:src="@drawable/hb_ch10_vote_pic5" />

        <ImageView
            android:id="@+id/iv6"
            android:layout_width="wrap_content"
            android:layout_height="wrap_content"
            android:layout_margin="5dp"
            android:layout_weight="1"
            android:src="@drawable/hb_ch10_vote_pic6" />
    </LinearLayout>

    <LinearLayout
        android:layout_width="match_parent"
        android:layout_height="0dp"
        android:layout_weight="3" >

        <ImageView
            android:id="@+id/iv7"
            android:layout_width="wrap_content"
            android:layout_height="wrap_content"
            android:layout_margin="5dp"
            android:layout_weight="1"
            android:src="@drawable/hb_ch10_vote_pic7" />

        <ImageView
            android:id="@+id/iv8"
            android:layout_width="wrap_content"
            android:layout_height="wrap_content"
            android:layout_margin="5dp"
            android:layout_weight="1"
            android:src="@drawable/hb_ch10_vote_pic8" />

        <ImageView
            android:id="@+id/iv9"
            android:layout_width="wrap_content"
            android:layout_height="wrap_content"
            android:layout_margin="5dp"
            android:layout_weight="1"
            android:src="@drawable/hb_ch10_vote_pic9" />
    </LinearLayout>

    <Button
        android:id="@+id/btnResult"
        android:layout_width="match_parent"
        android:layout_height="0dp"
        android:layout_weight="1"
        android:text="투표 종료" />

</LinearLayout>
package com.himedia.project4_2.hb_ch10_vote;
import android.content.Intent;
import android.os.Bundle;
import android.util.Log;
import android.view.View;
import android.widget.Button;
import android.widget.ImageView;
import android.widget.Toast;
import androidx.appcompat.app.AppCompatActivity;
import com.himedia.project4_2.R;
public class hb_ch10_vote_main extends AppCompatActivity {
@Override
protected void onCreate(Bundle savedInstanceState) {
super.onCreate(savedInstanceState);
setContentView(R.layout.hb_ch10_vote_main);
setTitle("명화 선호도 투표 (개선)");
// voteCount: 투표수
//
//투표수 초기화
final int voteCount[] = new int[9];
for (int i = 0; i < 9; i++) voteCount[i] = 0;
// 이미지 객체 담기
// log에 출력하면 R.id.iv1는 출력해볼 수 없으나
// String.valueOf(R.id.iv1)로 출력해보면 해당 객체 주소값 2131231248로 찍히는 것을 확인 할 수 있다.
Integer imageId[] = {R.id.iv1, R.id.iv2, R.id.iv3, R.id.iv4, R.id.iv5,R.id.iv6, R.id.iv7, R.id.iv8, R.id.iv9};
Log.v("sanghee", String.valueOf(R.id.iv1));
// 이미지이름 저장
final String imgName[] = {"독서하는 소녀", "꽃장식 모자 소녀", "부채를 든 소녀",
"이레느깡 단 베르양", "잠자는 소녀", "테라스의 두 자매", "피아노 레슨", "피아노 앞의 소녀들",
"해변에서"};
// image
// ImageView image[] = new ImageView[9];
// for (int i = 0; i < imageId.length; i++) { //9번돌려
// final int index; // 주의! 꼭 필요함..
// index = i;
//
//// 같은 순서대로 imageId에 담긴 객체를 ImageView image안에 넣고
// image[index] = (ImageView) findViewById(imageId[index]);
//// 그것이 클릭되었을때
// image[index].setOnClickListener(new View.OnClickListener() {
// public void onClick(View v) {
// // TODO Auto-generated method stub
// // voteCount의 해당 객체 투표수가 증가한다.
// voteCount[index]++;
// //동시에 Toast로 띄워준다.
// Toast.makeText(getApplicationContext(),
// imgName[index] + ": 총 " + voteCount[index] + " 표",
// Toast.LENGTH_SHORT).show();
// }
// });
// }
// 이부분에서 의문이 들었는데 왜 굳이 배열을 두개 만들어야 할까
ImageView image[] = {
findViewById(R.id.iv1), findViewById(R.id.iv2), findViewById(R.id.iv3),
findViewById(R.id.iv4), findViewById(R.id.iv5), findViewById(R.id.iv6),
findViewById(R.id.iv7), findViewById(R.id.iv8), findViewById(R.id.iv9)
};
// 오.. 잘 돌아가긴 하는데
// 우선 R.id.iv1에 hover 해 보면 public static abstract final int iv1 = 1000024라고 뜨는데
// 이 값이 Integer값이기 때문에 배열안에는 지정한 형만 들어올 수 있다는걸 보여주기 위해 굳이 분리한건가보다
// 그러면 findViewById는 형이 뭐지..? 최상윈가? id값으로 모든 형을 불러올 수 있으니까..
// 아니면 findViewById를 hover 했을때 아래와 같이 뜨는데
// public <T extends android.view.View> T findViewById( @IdRes int id )
// android의 View 모든 형을 extends 받은 제너릭 타입 함수 findViewById라
// @IdRes 언어테이션 주석임 int형 id값으로 모든 view를 가질 수 있는 칭구인가보다
for (int i = 0; i < image.length; i++) { //9번돌려
final int index; // 주의! 꼭 필요함..
index = i;
// 같은 순서대로 imageId에 담긴 객체를 ImageView image안에 넣고
// image[index] = (ImageView) findViewById(imageId[index]);
// 그것이 클릭되었을때
image[index].setOnClickListener(new View.OnClickListener() {
public void onClick(View v) {
// TODO Auto-generated method stub
// voteCount의 해당 객체 투표수가 증가한다.
voteCount[index]++;
//동시에 Toast로 띄워준다.
Toast.makeText(getApplicationContext(),
imgName[index] + ": 총 " + voteCount[index] + " 표",
Toast.LENGTH_SHORT).show();
}
});
}
Button btnFinish = (Button) findViewById(R.id.btnResult);
btnFinish.setOnClickListener(new View.OnClickListener() {
public void onClick(View v) {
// btnFinish이 클릭되었을때 결과class로 intent 객체를 만들어
Intent intent = new Intent(getApplicationContext(),
hb_ch10_vote_result.class);
//intent.putExtra로 VoteCount 와 ImageName를 전달한다.
intent.putExtra("VoteCount", voteCount);
intent.putExtra("ImageName", imgName);
//이동한다.
startActivity(intent);
}
});
}
}
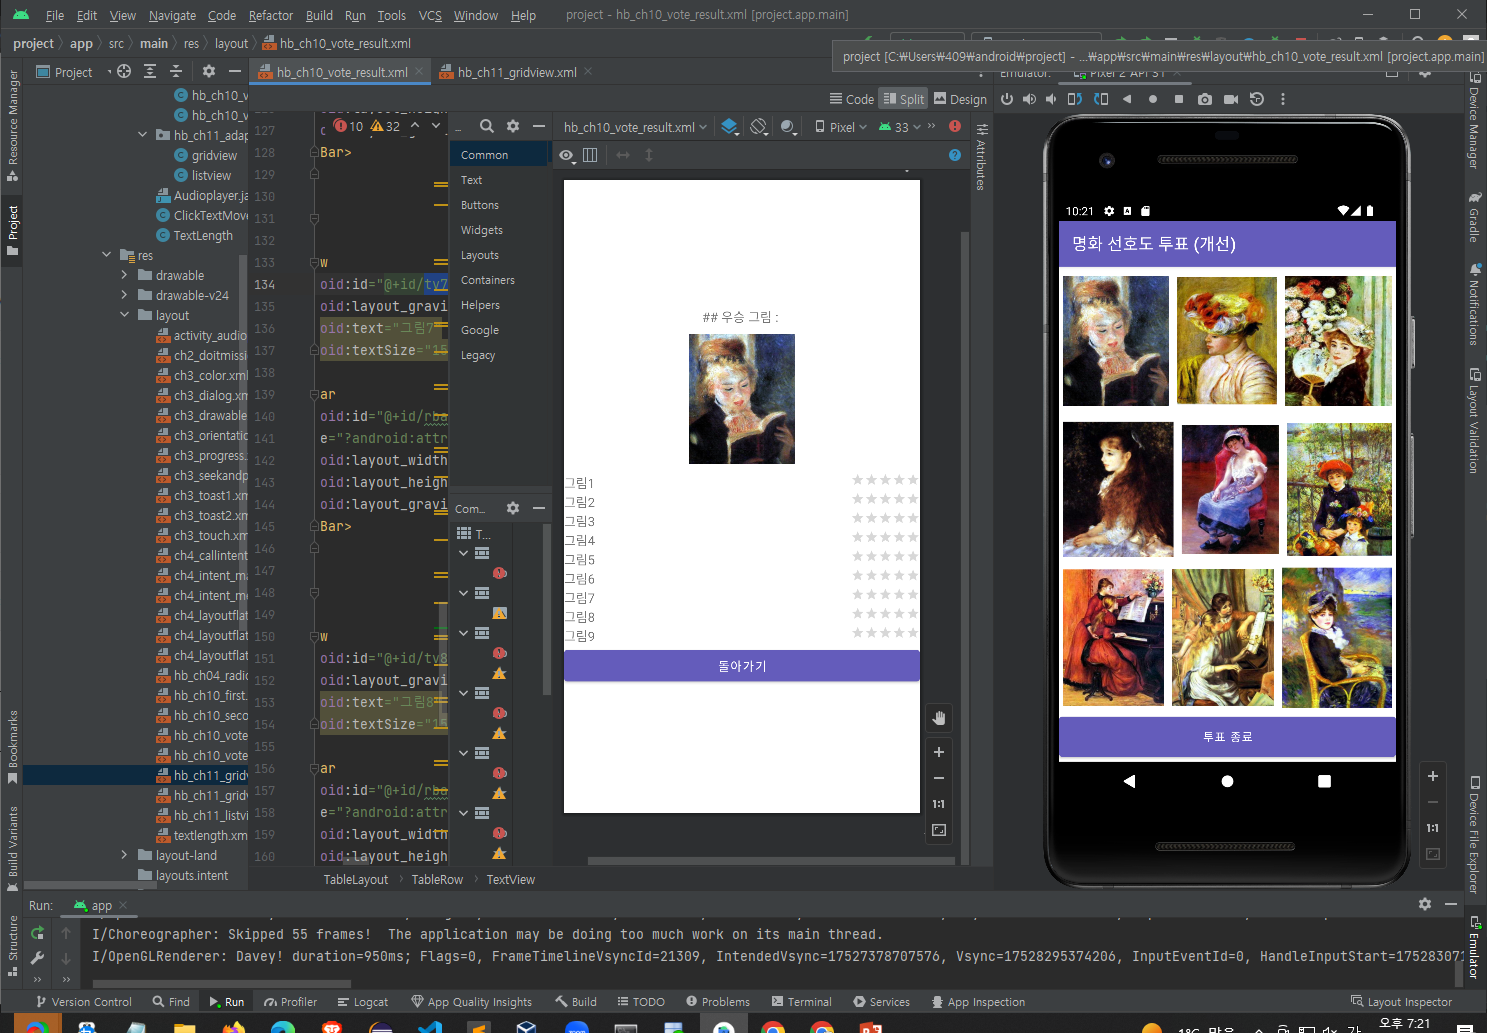
<TableLayout xmlns:android="http://schemas.android.com/apk/res/android"
    android:layout_width="match_parent"
    android:layout_height="match_parent"
    android:gravity="center_vertical"
    android:stretchColumns="0" >

    <TableRow>

        <TextView
            android:id="@+id/tvTop"
            android:layout_gravity="center"
            android:layout_span="2"
            android:text="## 우승 그림 : "
            android:textSize="15dp" />
    </TableRow>

    <TableRow>

        <ImageView
            android:id="@+id/ivTop"
            android:scaleType="fitCenter"
            android:layout_width="150dp"
            android:layout_height="150dp"
            android:layout_margin="10dp"
            android:layout_span="2"
            android:src="@drawable/hb_ch10_vote_pic1" />
    </TableRow>

    <TableRow>

        <TextView
            android:id="@+id/tv1"
            android:layout_gravity="center_vertical"
            android:text="그림1"
            android:textSize="15dp" />

        <RatingBar
            android:id="@+id/rbar1"
            style="?android:attr/ratingBarStyleSmall"
            android:layout_width="match_parent"
            android:layout_height="wrap_content"
            android:layout_gravity="right" >
        </RatingBar>
    </TableRow>

    <TableRow>

        <TextView
            android:id="@+id/tv2"
            android:layout_gravity="center_vertical"
            android:text="그림2"
            android:textSize="15dp" />

        <RatingBar
            android:id="@+id/rbar2"
            style="?android:attr/ratingBarStyleSmall"
            android:layout_width="match_parent"
            android:layout_height="wrap_content"
            android:layout_gravity="right" >
        </RatingBar>
    </TableRow>

    <TableRow>

        <TextView
            android:id="@+id/tv3"
            android:layout_gravity="center_vertical"
            android:text="그림3"
            android:textSize="15dp" />

        <RatingBar
            android:id="@+id/rbar3"
            style="?android:attr/ratingBarStyleSmall"
            android:layout_width="match_parent"
            android:layout_height="wrap_content"
            android:layout_gravity="right" >
        </RatingBar>
    </TableRow>

    <TableRow>

        <TextView
            android:id="@+id/tv4"
            android:layout_gravity="center_vertical"
            android:text="그림4"
            android:textSize="15dp" />

        <RatingBar
            android:id="@+id/rbar4"
            style="?android:attr/ratingBarStyleSmall"
            android:layout_width="match_parent"
            android:layout_height="wrap_content"
            android:layout_gravity="right" >
        </RatingBar>
    </TableRow>

    <TableRow>

        <TextView
            android:id="@+id/tv5"
            android:layout_gravity="center_vertical"
            android:text="그림5"
            android:textSize="15dp" />

        <RatingBar
            android:id="@+id/rbar5"
            style="?android:attr/ratingBarStyleSmall"
            android:layout_width="match_parent"
            android:layout_height="wrap_content"
            android:layout_gravity="right" >
        </RatingBar>
    </TableRow>

    <TableRow>

        <TextView
            android:id="@+id/tv6"
            android:layout_gravity="center_vertical"
            android:text="그림6"
            android:textSize="15dp" />

        <RatingBar
            android:id="@+id/rbar6"
            style="?android:attr/ratingBarStyleSmall"
            android:layout_width="match_parent"
            android:layout_height="wrap_content"
            android:layout_gravity="right" >
        </RatingBar>
    </TableRow>

    <TableRow>

        <TextView
            android:id="@+id/tv7"
            android:layout_gravity="center_vertical"
            android:text="그림7"
            android:textSize="15dp" />

        <RatingBar
            android:id="@+id/rbar7"
            style="?android:attr/ratingBarStyleSmall"
            android:layout_width="match_parent"
            android:layout_height="wrap_content"
            android:layout_gravity="right" >
        </RatingBar>
    </TableRow>

    <TableRow>

        <TextView
            android:id="@+id/tv8"
            android:layout_gravity="center_vertical"
            android:text="그림8"
            android:textSize="15dp" />

        <RatingBar
            android:id="@+id/rbar8"
            style="?android:attr/ratingBarStyleSmall"
            android:layout_width="match_parent"
            android:layout_height="wrap_content"
            android:layout_gravity="right" >
        </RatingBar>
    </TableRow>

    <TableRow>

        <TextView
            android:id="@+id/tv9"
            android:layout_gravity="center_vertical"
            android:text="그림9"
            android:textSize="15dp" />

        <RatingBar
            android:id="@+id/rbar9"
            style="?android:attr/ratingBarStyleSmall"
            android:layout_width="match_parent"
            android:layout_height="wrap_content"
            android:layout_gravity="right" >
        </RatingBar>
    </TableRow>

    <TableRow>

        <Button
            android:id="@+id/btnReturn"
            android:layout_width="wrap_content"
            android:layout_height="wrap_content"
            android:layout_span="2"
            android:text="돌아가기" />
    </TableRow>

</TableLayout>
package com.himedia.project4_2.hb_ch10_vote;
import android.content.Intent;
import android.os.Bundle;
import android.view.View;
import android.widget.Button;
import android.widget.ImageView;
import android.widget.RatingBar;
import android.widget.TextView;
import androidx.appcompat.app.AppCompatActivity;
import com.himedia.project4_2.R;
public class hb_ch10_vote_result extends AppCompatActivity {
@Override
protected void onCreate(Bundle savedInstanceState) {
super.onCreate(savedInstanceState);
setContentView(R.layout.hb_ch10_vote_result);
setTitle("투표 결과");
// result 화면에 띄울 imgview와 txt영역을 가져온다.
TextView tvTop = (TextView) findViewById(R.id.tvTop);
ImageView ivTop = (ImageView) findViewById(R.id.ivTop);
// main에서 보낸 intent를 받아낸다.
// 앞에서 intent.putExtra로 voteCount와 imgName배열을 받아냈었다.
// 각각을 voteResult imageName으로 받아내 사용하기로 한다.
Intent intent = getIntent();
int[] voteResult = intent.getIntArrayExtra("VoteCount");
String[] imageName = intent.getStringArrayExtra("ImageName");
//Integer형 imageFileId배열에 drawable폴더에있는 이미지 들을 순서대로 담고
Integer imageFileId[] = {R.drawable.hb_ch10_vote_pic1, R.drawable.hb_ch10_vote_pic2,
R.drawable.hb_ch10_vote_pic3, R.drawable.hb_ch10_vote_pic4, R.drawable.hb_ch10_vote_pic5,
R.drawable.hb_ch10_vote_pic6, R.drawable.hb_ch10_vote_pic7, R.drawable.hb_ch10_vote_pic8,
R.drawable.hb_ch10_vote_pic9};
//최고값을 maxEntry에 저장하기전 초기화한다.
int maxEntry = 0;
for (int i = 1; i < voteResult.length; i++) { //9번 돌려
if (voteResult[maxEntry] < voteResult[i])//i번째 값을 비교해 최고값을 구한다.
maxEntry = i;//최고값 순서 i를 maxEntry에 넣는다.
}
//최고값 순서 i와 동일한 순서 imageName을 찾아내 setText
//최고값 순서 i와 동일한 순서 imageFileId 찾아내 setImageResource
tvTop.setText(imageName[maxEntry]);
ivTop.setImageResource(imageFileId[maxEntry]);
// 최고값의 이미지 name과 이미지를 표현하는것까지 끝났다.
// //TextView와 RatingBar배열을 만들어
// TextView tv[] = new TextView[imageName.length];
// RatingBar rbar[] = new RatingBar[imageName.length];
//
// // 각각에 객체 id를 넣고
// Integer tvID[] = { R.id.tv1, R.id.tv2, R.id.tv3, R.id.tv4, R.id.tv5,
// R.id.tv6, R.id.tv7, R.id.tv8, R.id.tv9 };
// Integer rbarID[] = { R.id.rbar1, R.id.rbar2, R.id.rbar3, R.id.rbar4,
// R.id.rbar5, R.id.rbar6, R.id.rbar7, R.id.rbar8, R.id.rbar9 };
//
// // 각 리스트 9번 돌려 객체를 찾아 배열에 다시 넣는다.
// for (int i = 0; i < voteResult.length; i++) {
// tv[i] = (TextView) findViewById(tvID[i]);
// rbar[i] = (RatingBar) findViewById(rbarID[i]);
// }
//
// // 각 리스트 9번 돌려 setText해주고 setRating해준다.
// for (int i = 0; i < voteResult.length; i++) {
// tv[i].setText(imageName[i]);
// rbar[i].setRating((float) voteResult[i]);
// }
// 이것도 마찬가지로 굳이 왜 id배열을 더 만들어야 하는지 의문이 생겨 추가 테스트했다.
//TextView와 RatingBar배열을 만들어
TextView tv[] = {
findViewById(R.id.tv1), findViewById(R.id.tv2), findViewById(R.id.tv3),
findViewById(R.id.tv4), findViewById(R.id.tv5), findViewById(R.id.tv6),
findViewById(R.id.tv7), findViewById(R.id.tv8), findViewById(R.id.tv9)
};
RatingBar rbar[] = {
findViewById(R.id.rbar1), findViewById(R.id.rbar2), findViewById(R.id.rbar3),
findViewById(R.id.rbar4), findViewById(R.id.rbar5), findViewById(R.id.rbar6),
findViewById(R.id.rbar7), findViewById(R.id.rbar8), findViewById(R.id.rbar9)
};
// 각 리스트 9번 돌려 setText해주고 setRating해준다.
for (int i = 0; i < voteResult.length; i++) {
tv[i].setText(imageName[i]);
rbar[i].setRating((float) voteResult[i]);
}
//btnReturn를 클릭하면 해당 result화면을 닫는다.
Button btnReturn = (Button) findViewById(R.id.btnReturn);
btnReturn.setOnClickListener(new View.OnClickListener() {
public void onClick(View v) {
finish();
}
});
}
}
이미지뷰 구현하기
<LinearLayout xmlns:android="http://schemas.android.com/apk/res/android"
    xmlns:tools="http://schemas.android.com/tools"
    android:layout_width="fill_parent"
    android:layout_height="fill_parent"
    android:orientation="vertical" >

    <!-- 4칸짜리 GridView1을 넣었다. -->
    <GridView
        android:id="@+id/gridView1"
        android:layout_width="match_parent"
        android:layout_height="wrap_content"
        android:gravity="center"
        android:numColumns="4" >
    </GridView>

</LinearLayout>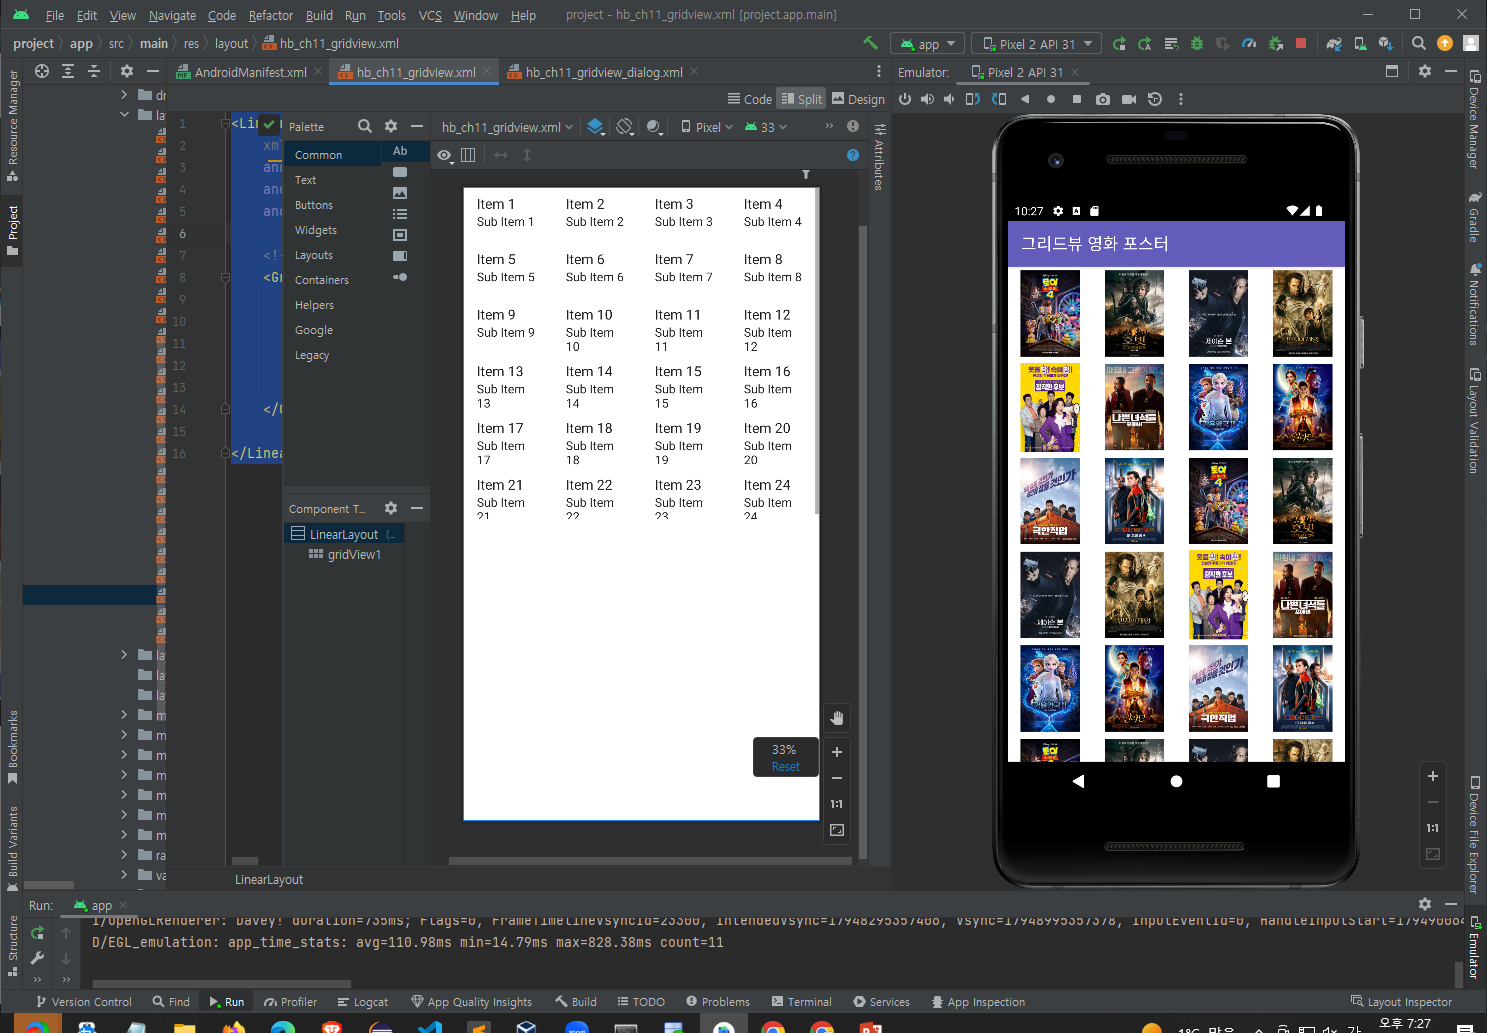
<LinearLayout xmlns:android="http://schemas.android.com/apk/res/android"
    xmlns:tools="http://schemas.android.com/tools"
    android:layout_width="match_parent"
    android:layout_height="match_parent"
    android:gravity="center"
    android:orientation="vertical" >

    <!-- ImageView만 들어있다. -->
    <ImageView
        android:id="@+id/ivPoster"
        android:layout_width="wrap_content"
        android:layout_height="wrap_content" />

</LinearLayout>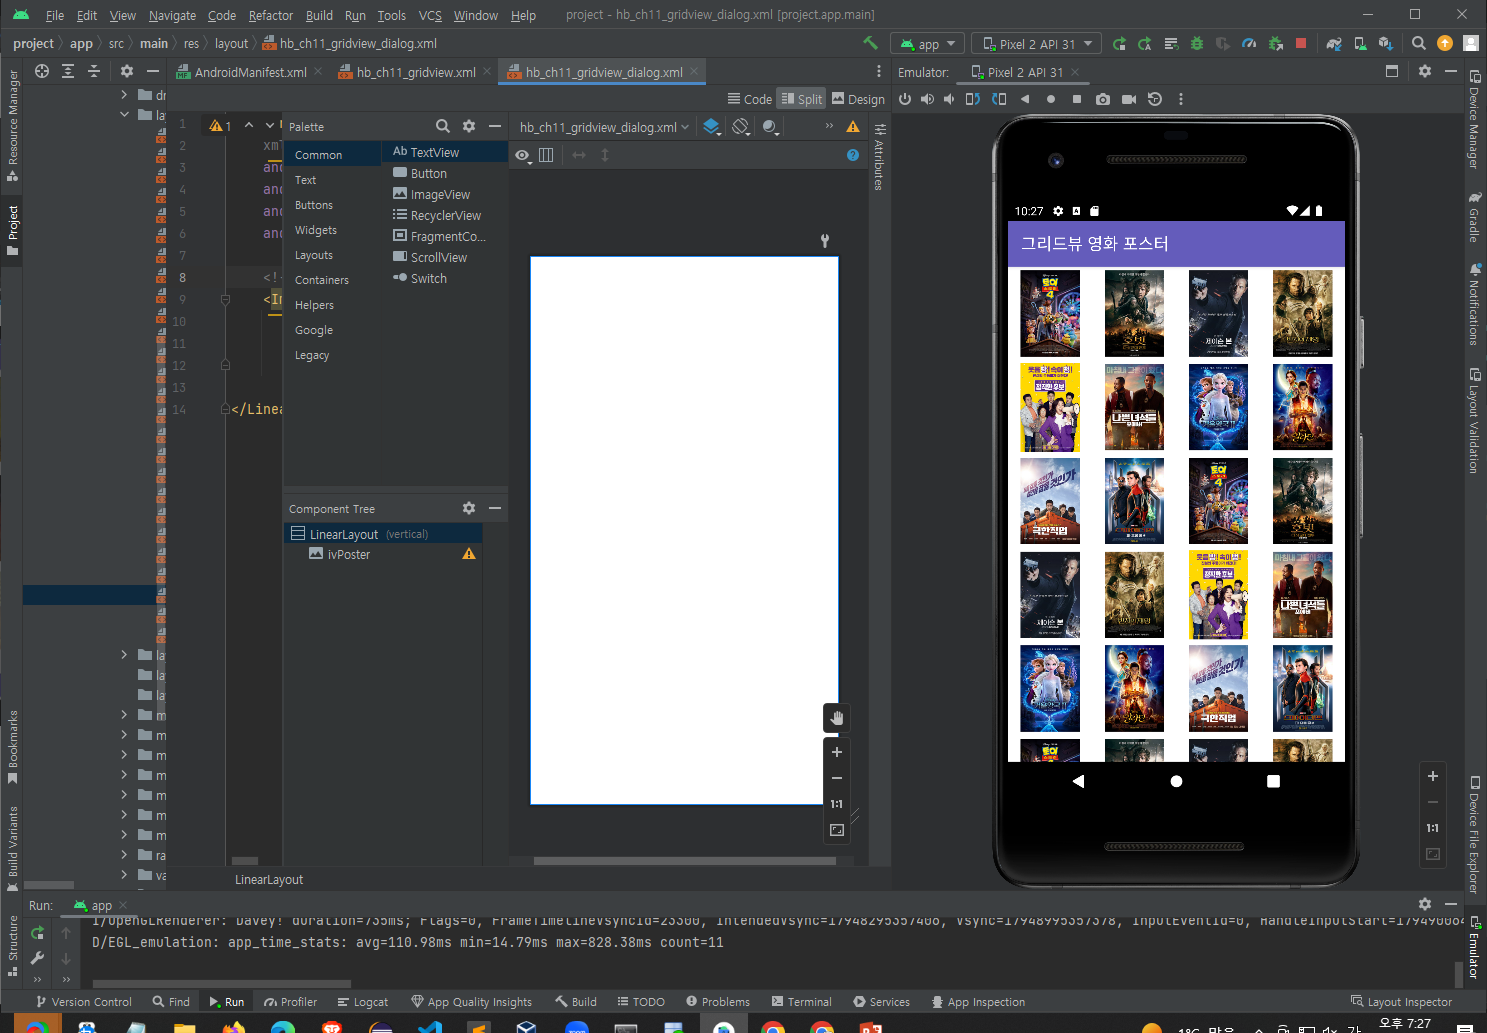
package com.himedia.project4_2.hb_ch11_adapterview;

import android.content.Context;
import android.os.Bundle;
import android.view.View;
import android.view.ViewGroup;
import android.widget.BaseAdapter;
import android.widget.GridView;
import android.widget.ImageView;
import androidx.appcompat.app.AlertDialog;
import androidx.appcompat.app.AppCompatActivity;
import com.himedia.project4_2.R;

public class gridview extends AppCompatActivity {

    @Override
    public void onCreate(Bundle savedInstanceState) {
        super.onCreate(savedInstanceState);
        setContentView(R.layout.hb_ch11_gridview);
        setTitle("그리드뷰 영화 포스터");

//        gridView1객체와 아래 생성한 class를 찾아 객체를 만들었다.
        final GridView gv = (GridView) findViewById(R.id.gridView1);
        MyGridAdapter gAdapter = new MyGridAdapter(this);

//        GridView객체에 class에 정의한것을 set한다.
        gv.setAdapter(gAdapter);
    }

//   extends BaseAdapter
//   스크롤이 보이지 않을 자식 View까지 미리 그려 메모리 사용량이 증가하는 ScrollView를 대신
//   현재 화면에 보이지 않는 자식 뷰를 미리 생성하지 않고 스크롤되어 보여야할 때 생성
    public class MyGridAdapter extends BaseAdapter {

        Context context; //Context 액티비티와 애플리케이션에 대한 정보
        public MyGridAdapter(Context c) {
            context = c;
        }

//    BaseAdapter
        //BaseAdapter가 제공하는 getCount, posterID[]의 길이로 지정한다.
        public int getCount() {return posterID.length;}

        //BaseAdapter가 제공하는 getItem, 아무런세팅을 하지않았다.
        public Object getItem(int position) {
            // TODO Auto-generated method stub
            return null;
        }
    //BaseAdapter가 제공하는 getItemId, 아무런세팅을 하지않았다.
        public long getItemId(int position) {
            // TODO Auto-generated method stub
            return 0;
        }

        //이미지를 posterID 배열에 저장
        Integer[] posterID = { R.drawable.mov01, R.drawable.mov02,
                R.drawable.mov03, R.drawable.mov04, R.drawable.mov05,
                R.drawable.mov06, R.drawable.mov07, R.drawable.mov08,
                R.drawable.mov09, R.drawable.mov10, R.drawable.mov01,
                R.drawable.mov02, R.drawable.mov03, R.drawable.mov04,
                R.drawable.mov05, R.drawable.mov06, R.drawable.mov07,
                R.drawable.mov08, R.drawable.mov09, R.drawable.mov10,
                R.drawable.mov01, R.drawable.mov02, R.drawable.mov03,
                R.drawable.mov04, R.drawable.mov05, R.drawable.mov06,
                R.drawable.mov07, R.drawable.mov08, R.drawable.mov09,
                R.drawable.mov10 };

        public View getView(int position, View convertView, ViewGroup parent) {
            //dialog용.xml에 ImageView설정
            ImageView imageview = new ImageView(context); //객체를 가져와
            imageview.setLayoutParams(new GridView.LayoutParams(200, 300)); //창 크기를 정하기
            imageview.setScaleType(ImageView.ScaleType.FIT_CENTER);//가운데 정렬하기
            imageview.setPadding(5, 5, 5, 5);//패딩값 적용하기
            imageview.setImageResource(posterID[position]);//이미지경로 넣어주기

            final int pos = position;
            //imageview를 클릭하면
            imageview.setOnClickListener(new View.OnClickListener() {
                public void onClick(View v) {

                    //AlertDialog으로 예쁘게 창 위에 띄울예정.
                    //기본세팅을 한다.
                    AlertDialog.Builder dlg = new AlertDialog.Builder(gridview.this);
                    dlg.setTitle("큰 포스터");
                    dlg.setIcon(R.drawable.ic_launcher);
                    dlg.setNegativeButton("닫기", null);

                    //AlertDialog body 부분에 setView로 hb_ch11_gridview_dialog를 가져와 띄울건데
                    //inflate를 이용해 layout에 그때 그때 다른 layout을 집어 넣을 수 있게 할것이다.

                    //View를 준비하자
                    //이 View는 inflate 형식으로 만들어진다.
                    //gridview형식으로 hb_ch11_gridview_dialog를 불러와 저장한다.
                    View dialogView = (View) View.inflate(
                            gridview.this, R.layout.hb_ch11_gridview_dialog, null);

                    //hb_ch11_gridview_dialog안에 있는 ImageView의 이미지 주소를
                    ImageView ivPoster = (ImageView) dialogView
                            .findViewById(R.id.ivPoster);
                    //pos = posterID[position] pos번째 로 세팅한다.
                    ivPoster.setImageResource(posterID[pos]);

                    //이를 body부분에 set하고 show 보여주자.
                    dlg.setView(dialogView);
                    dlg.show();

                }
            });

            return imageview;
        }
    }
}